Mother Chocolate’s Recipes
10/30/20
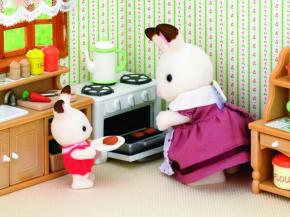
Yorkshire Puddings
Hello my dears, it’s been an awfully long time since I last saw you! Now summer has passed I thought I would show you my favourite, winter warming recipe. It’s a classic – Yorkshire puddings! At home, I always make time to cook Freya and her siblings a special Sunday meal with Yorkshire puddings on the side. They’re everyone’s favourite treat after all and easy peasy to make! Now then, aprons on and let’s get started!
Ingredients:
140g plain flour
4 eggs
200ml milk
Oil (for cooking)
Method:
First things first, ask your adult helper to turn the oven up to 230 degrees. It has to be hot, hot, hot if you want your Yorkshire’s to puff up!
Get yourself two muffin trays and drizzle a little oil evenly into each hole, then ask your adult helper to carefully place them into the oven to heat through.
Now it’s time to make the batter! Tip your flour into a bowl and beat in the eggs until nice and smooth.
Slowly add the milk in small portions, not all at once! Keep beating the mixture until the batter is completely lump free, then give it a sprinkling of salt and pepper.
Pour the batter into a jug and very carefully remove your muffin trays from the oven - the oil will be very hot so you must get your adult helper to do this step, we don’t want any burnt paws after all!
Very carefully pour the batter equally into each tray, so you end up with 24 pots of Yorkshire pudding batter.
Pop the trays back into the oven and bake for 20-25 minutes. It’s super important you don’t peak at them while they cook or open the oven door, as they won’t become nice and puffy otherwise.
Once they’re a nice golden brown they’re ready to serve! I recommend having them with your favourite vegetables and hot gravy – delicious!
There, I promised you they were easy peasy to make! Are you going to try and make your own? Let me know how you get on, I love to see everything you make!

Mother Chocolate’s Recipes
05/07/20
VE Day scones
Hello there, my little rosebuds! I hope you’ve been enjoying your home-schooling lessons, learning lots of new and interesting things? I’ve been busy in the kitchen trying out some new recipes which I can’t wait to share with you all!
Did you know that this Friday is VE Day? Seeing as we can’t go out to celebrate this year, we thought we’d have our very own garden party instead! Everyone is very busy at home getting ready for it and I’m just about to bake the scones for the afternoon tea – would you like me to teach you the recipe, so you can make your own? Wonderful! Aprons at the ready then!
These are the ingredients you’ll need:
- 350g self-raising flour, plus more for dusting
- ¼ tsp salt
- 1 tsp baking powder
- 85g butter, cut into cubes
- 3 tbsp caster sugar
- 175ml milk
- 1 tsp vanilla extract
- squeeze lemon juice
- beaten egg, to glaze
- jam and clotted cream, to serve
First things first, ask your adult helper to pop the oven on to 220°C/fan 200°C so it’s nice and hot.
Tip the flour into a large mixing bowl along with the salt and baking powder, then mix it all together.
Now for the messy part! Add in the cubes of butter and use your finger trips to rub it into the flour mixture, so that it looks like fine breadcrumbs. Make sure the butter is cold when you do this, so have the cubes ready and waiting in the fridge. Once it’s all combined, add the caster sugar.
Pour the milk into a microwaveable jug and pop it into the microwave for about 30 seconds until it’s warm. Keep a close eye on it though, as you don’t want it to be hot or to spill everywhere! Once it’s ready, add the vanilla extract and squeeze of lemon juice then set aside for a moment.
Ask your adult helper to put your baking tray into the oven so that it has time to heat up.
Now it’s back to your flour mixture! Make a little well in the middle of the bowl, gently pour the milk mixture in and carefully use a knife to mix it all together. Don’t worry if it seems a bit wet and sticky at first, it will all come together with a little work!
Scatter some flour onto your work surface before tipping your dough out onto it. Cover your hands and the dough in some flour to stop it sticking, then its time to get messy again! To fold your dough, roll the mixture together on the counter and keep turning it over by 90° 2/3 times, until you have a smooth dough. Be careful not to overwork it as you want to keep the air inside – we don’t want flap scones now, do we?
Pat the dough down into a round shape about 4cm deep then dip a 5cm round cutter into some flour. Firmly press it into the dough until you have eight scones and set them aside. You may need to re-roll the dough into another round to make the last few scones.
Brush the tops of your scones with the beaten egg, then ask your adult help to carefully place them on the hot tray before popping them back into the oven for 10 minutes, or until risen and gold on top.
Don’t they smell delicious? You can eat them warm out the oven or cold, with butter or a savoury filling like cheese and pickle. I’ll be serving mine on Friday with lots of clotted cream and jam for a traditional VE Day afternoon tea!
Mother Chocolate’s Recipes
04/24/20
Banana Bread
Oh hello there, how wonderful to see you again! I’ve missed our baking sessions so hope you’ve been practising lots whilst you’ve been at home? Baking always cheers me up when I’m feeling a little down and it means there’s always something delicious for an afternoon snack once your home schooling lessons have finished!
I’ve got some bananas that need using up so thought I’d make some banana bread. I’ll teach you my recipe and then you can try making it home with your family!
These are the ingredients and equipment you’ll need:
· 285g/10oz plain flour
· 1 tsp bicarbonate of soda
· ½ tsp salt
· 110g/4oz butter, plus extra for greasing
· 225g/8oz caster sugar
· 2 free-range eggs
· 4 ripe bananas, mashed
· 85ml/3fl oz buttermilk (or normal milk mixed with 1½ tsp lemon juice or vinegar)
· 1 tsp vanilla extract
· 20cm x 12.5cm/8in x 5in loaf tin
First things first, get your adult helper to pop the oven on to 180°C/350°F so it’s toasty warm.
Gently sift the flour, bicarb of soda and salt into a large mixing bowl and give it a good stir together.
In a separate bowl, add the butter and sugar. Cream this together using a spatula until it’s light and fluffy.
Once the butter and sugar are creamed together, add in the eggs, mashed bananas and vanilla extract and mix well. Next tip in the flour mixture and combine it all together. You can always ask your adult helper to have a go at this if your arms get a little tired.
We’re very nearly ready to bake! If you want to add in some walnuts or raisins to the mixture, you can do so now. Line your loaf tin with baking parchment and pour in the batter, being careful that it doesn’t go on the outside of the paper. You can gently tap the tin on your kitchen surface to make the batter even out and get rid of any air bubbles.
Now pop it into the oven to bake for an hour or until it’s golden brown. You can test to make sure it’s cooked by sticking a skewer in. If it comes out clean, then your banana bread is done! I always like to lick the bowl clean whilst I wait for it to bake!
When it’s done, take it out of the oven and pop it onto a wire rack to cool down. Then enjoy a big slice with a cup of acorn tea for your afternoon snack! It’s also extra yummy toasted with a dollop of ricotta!
Mother Chocolate’s Recipes
02/13/20
Valentine's Day truffles
Hello there my little sweeties! How lovely for you to pop in - it’s been a while since I’ve seen you and what perfect timing, as I’m just about to make some Valentine’s Day truffles! I do love Valentine’s Day! It’s a wonderful opportunity to remind all your loved ones just how much you care for them.
Do you have a special someone in mind that you could gift these truffle to? Or maybe you’d just like to treat yourself? Either way they’re going to be delicious!
First, let’s gather up all our ingredients. You will need:
- 85g, heavy cream
- 170g, 60% dark chocolate (chopped into small chunks)
- 255g, plain biscuits
- Pink sprinkles (yum!)
Don’t forget the equipment!:
- Small saucepan
- Wooden spoon
- Food processor
- Large bowl
- Spatula
- Large plate
- Tea towel
- Decorative box (optional)
Now we have everything, let’s start started! I know its awfully tempting, but we must try not to eat the chocolate or biscuits before we’re finished! Oh go on then, just the one though!
First, pour the cream into a small saucepan and ask an adult to help you to bring it to the boil, stirring it occasionally so it doesn’t stick to the pan.
Once it’s started to boil, you can add your chopped chocolate. Carry on mixing until the chocolate is all melted and you have a smooth liquid, then take the pan off the heat and wait for it to cool down to room temperature. Hmmm doesn’t it smell delicious?
While you’re waiting for the mixture to cool, put the biscuits into the food processor until you have a flour-like texture. Now pop the biscuit flour into a large bowl and pour the delicious chocolate mixture over it. Mix it all together with a spatula then pop it in the fridge for 20 minutes. Phew, this is tiring work! Shall we have a cup of acorn tea while we wait?
*20 minutes later*
Well done for being so patient! Now it’s time to shape your truffles! Wet your paws and roll the mixture into small balls, then cover them in the pink sprinkles. You can decorate your truffles however you’d like – little slice of strawberry or red hearts would look extra sweet!
Place all your finished truffles onto a large plate, cover them with a tea towel and pop them back in the fridge for at least four hours.
That’s it my little ones, you’ve made your very first truffles! Just remember to take them out of the fridge half an hour before serving and they’ll be ready to eat. All that’s left to do is pop them in a pretty little box and then you can gift (or keep) them!
Mother Chocolate’s Recipes
05/02/19
Fairy Cakes
*Nibble, chomp* Oh, hi there! We didn’t see you come in… we were just testing the decorations to make sure they are tasty enough. We can confirm they are delicious! All we need now are some cakes to put the icing on. Would you like to help us? Mother Chocolate’s recipe is top secret, but she’s going to teach us today because we’ve been extra good!
First of all we need to gather together all the ingredients.
Here’s a list of everything we need:
110g/4oz butter or margarine, softened at room temperature
110g/4oz caster sugar
2 free-range eggs, lightly beaten
1 tsp vanilla extract
110g/4oz self-raising flour
1-2 tbsp milk
For the icing
300g/10½oz icing sugar
2-3 tbsp water
2-3 drops food colouring
hundreds and thousands, or other cake decorations
And don’t forget the equipment:
A large mixing bowl
Fairy cake cases
Fairy cake baking tray
A wooden spoon
A large metal spoon
Now we’re all ready to make the yummiest fairy cakes in Sylvania! Even the Village Cake Shop will be impressed by our cakes.
Before you start mixing together the ingredients, you need to preheat the oven to 180C/350F/Gas 4. It’s also a good idea to line 2 x 12-hole fairy cake tins with paper cases before getting messy!
Now, cream the butter and sugar together in a bowl until it is light and fluffy, just like Ralph’s tail! Beat in the eggs, a little at a time, and stir in the vanilla extract.
Fold in the flour using a large metal spoon. Folding is a little bit different to stirring, all you have to do is scoop around the bottom of the bowl and fold the mixture in half, almost like helping with the washing! It makes the cakes fluffy and light.
Add a little milk until the mixture is a soft dropping consistency (this means it doesn’t stick to the spoon if you turn it over, but make sure it’s not too runny either) and spoon the mixture into the paper cases until they are half full.
You’re now ready to bake your delicious treats in the oven for 8-10 minutes. You can tell they are ready when they are beautiful golden-brown on top. If you poke the cakes with a skewer it should come out clean – if there is any cake mixture left on there, you’ll need to bake your fairy cakes for another couple of minutes.
Now, this is the hardest bit. Set the fairy cakes aside to cool for 10 minutes, then remove from the tin and place on a wire rack. It can be hard to keep your little paws off the hot cakes, so we always play a game to keep busy while they cool!
Next is the second best part, icing!
Sift the icing sugar into a large mixing bowl and stir in enough water to create a smooth mixture. Stir in the food colouring in any colour you like! Drizzle the icing over your cakes and decorate while it’s still soft. Just a few more minutes while the icing sets and they’re ready to eat! Yum!
Mother Chocolate’s Recipes
11/19/18
Christmas Pudding
Hello there, my little mince pie! Christmas is just around the corner so it’s time to start planning all the festive activities! It’s getting quite chilly outside, so why don’t you warm yourself up by helping me make this year’s Christmas pudding? These cakes are extra special and you can make them a week or so before Christmas, but I think they taste even better if you let all the delicious flavours soak together for a few days beforehand.
Before we can start baking, we need to make sure we have all the right ingredients. This what we’ll need today:
· 180g Mixed dried fruits – I love sour cherries, raisins and cranberries but you can choose anything!
· 60g Dates – stoned and chopped
· 60g Glace cherries – chopped
· 60g Dried apricots – chopped
· 90g Plain flour
· 90g Fresh white breadcrumbs
· 60g Dark soft brown sugar
· 60g Vegetarian spread
· 60g Carrot – grated
· 60g Cooking apple – grated
· 30g Walnuts – finely chopped
· 1 Egg
· 1tbs Black treacle
· 1tsp Mixed spice
· Grated rind and juice of a lemon
· Milk
First things first, we need a large mixing bowl and wooden spoon for mixing everything up in, and a 1.2 litre pudding basin for the cooking. Make sure you grease the sides of the pudding basin before putting in the cake mix or it’ll get horribly stuck! Then we just need some string and tin foil – did you know you can make a wish while you’re making a Christmas pudding? So keep your eyes tight shut and think of your very bestest wish!
Now we have everything we need, it’s time to start baking. The first step is easy peasy lemon squeezy! Just pop all of your ingredients into the bowl and mix together until it’s nicely soft and smooth. It needs to be just right, so to check, scoop up some mixture on the spoon and turn it upside down. If it stays stuck to the spoon, it’s a bit too thick and you need to add a tiny bit of milk.
Next, pour your pudding mixture into the greased pudding basin. There are so many yummy ingredients in the pudding it can get quite heavy, so it’s best to ask an adult for some help with this. Now cover the basin with tin foil and tie it on with some string. This has got to stay on while it cooks, so make sure it’s done up good and tight!
The best way to cook a Christmas pudding is to steam it, so make sure you have a grown up helper for this bit - we don’t want any burned paws. Get your grown up helper to place a steamer over a pan of boiling water, then pop in the pudding before placing a lid on top. Now you just need to wait until it’s done! This bit requires some patience so why don’t you go exploring and find some holly leaves to decorate the pudding? They aren’t for eating but they look rather lovely.
After the pudding has steamed for 5 hours, it will be ready to eat! Here at the Chocolate household we love to eat it with hazelnut ice cream but it tastes wonderful with cream or custard!
https://www.nationaltrust.org.uk/recipes/vegetarian-and-alcohol-free-christmas-pudding
Mother Chocolate’s Recipes
10/24/16
Pumpkin Pie
It’s almost Halloween little ones – have you got your costumes ready? I was busy last night making a cape for Freya but I’m not allowed to tell you what she’s going as, that would ruin the surprise!
The eve after Halloween, we’ll be having a real treat for dinner… pumpkin pie of course! It tastes absolutely spooktacular! I’ve got a spare little pumpkin bobbing about so shall we make a quick one now?
What you’ll need to make your pumpkin pie:
750g/1lb 10oz pumpkin
350g sweet shortcrust pastry
plain flour, for dusting
140g caster sugar
½ tsp salt
½ tsp fresh nutmeg, grated
1 tsp cinnamon
2 eggs, beaten
25g butter, melted
175ml milk
1 tbsp icing sugar
STEP 1
After a fun Halloween eve, it’s time to put your pumpkin to good use! Pop it in a large saucepan, cover with water and ask an adult to bring it to the boil. Cover with a lid and simmer for 15 mins or until nice and squishy. Drain your pumpkin off and let him cool down for a few minutes.
STEP 2
Ask a grown up to heat your oven to 180C. Then, being as careful as you can, roll out the pastry on a lightly floured surface and use it to line a loose-bottomed tin - chill for 15 mins in the fridge. Why don’t you play with your Sylvanians while you’re waiting?
STEP 3
Line the pastry with baking parchment and baking beans, then bake for 15 mins. Remove the beans and paper – be sure not to spill any and remember, it’s hot, hot, hot - and cook for a further 10 mins until the base is pale golden and biscuity. Yum! It’s starting to look scrummy already. Remove from the oven and allow to cool slightly. Pumpkins need to breathe too, don’t you know.
STEP 4
Ask an adult to kindly increase the oven temperature to 220C. Push the cooled pumpkin through a sieve – that’s it, keep going - into a large bowl. In a separate bowl, pop the sugar, salt, nutmeg and half the cinnamon in all together. Mix in the beaten eggs, melted butter and milk, then add to the pumpkin purée and stir to combine. My arms always ache a little so if you need a helping hand, you can ask an adult.
STEP 5
Pour into the tart shell and cook for 10 mins, then ask a grown up to reduce the temperature to 180C. Continue to bake for 35-40 mins until the filling has just set. See, pumpkins aren’t just good for Halloween! OooooOoOOOOOoooo!
STEP 5
Leave to cool, then remove the pie from the tin really carefully, being sure not to drop it! Mix the remaining cinnamon with the icing sugar and dust over the pie. Perfect!
Now you know the recipe, you can make your own pumpkin pie… I bet you just can’t wait to get started! What a treat!
Mother Chocolate’s Recipes
05/31/16
Making Pizza
What could be better than freshly baked bread? Why, freshly baked dough with lots of toppings of course! I’m just about to make the yummiest pizza you did ever taste – do you want to help?
What you’ll need to make your pizza:
1/2 of one garlic-herb pizza crust
1/2 cup of each colour: chopped red, green and orange bell pepper
1/3 cup of chopped red onion
1 cup of chopped button mushrooms
1/2 tsp each dried or fresh basil, oregano and garlic powder
1/4 tsp sea salt
1/2 cup parmesan cheese to sprinkle on top
Red pepper flake + dried oregano
What you’ll need to make your sauce:
1 15oz can of tomato sauce
1/2 tsp each dried or fresh basil, oregano, garlic powder, granulated sugar
1/4 tsp sea salt
Have you washed your paws? Well done, little one, now go and get your apron on and then we can begin!
Step 1
Ask an adult to preheat your oven to 220 degrees so that it’s nice and hot for when your pizza is ready to go in. Then, ask your grown-up to warm a large pan and, once it’s hot, carefully add 1 tbsp olive oil, onion and peppers. If you sprinkle some salt and herbs in then it’ll give your pizza a delicious flavour! Cook until soft for 10-15 minutes, adding the mushrooms in the last few minutes (they don’t take long to cook at all!). Set them aside in a little bowl, covered with a tea towel so they don’t get too cold.
Step 2
Now for the sauce! Add the tomato sauce to a mixing bowl along with the seasonings and salt. Mix it all together but make sure you don’t get too much on your apron! If your arm starts to hurt, ask a grown-up to give it one last mix.
Step 3
Roll out your dough onto a floured surface, making a circle shape which isn’t too thin but isn’t too thick. Carefully pop the dough circle onto a parchment-lined baking sheet. Top with just the right amount of tomato sauce, a sprinkle of parmesan cheese and the veggies. Is that your tummy rumbling?
Step 4
You’ll need a grown-up for this last part - use the baking sheet to gently slide the pizza onto the oven rack. Make sure you leave the parchment underneath, otherwise it will fall through and we don’t want that happening now, do we? Bake for 17-20 minutes, until crisp and golden brown like the sun. Bake, bake, bake a pizza, doesn’t it smell great!
Step 5
Ask an adult to carefully take the pizza out of the oven and then it’s your turn to sprinkle the parmesan cheese, dried oregano and red pepper flake on top. Be careful poppet, don’t touch the tray because it’ll be hot, hot, hot.
Yum! It looks delicious! Did you know that pizza is just as scrummy when it’s cold? Why don’t you keep some for tomorrow?
You can buy your own Pizza Delivery Set HERE.
Mother Chocolate’s Recipes
02/22/16
Rainbow Cake
Hello there, I haven’t seen you in quite some time! You had better roll your sleeves up and wash your hands so that we can get started.
Now, little one, I’ve got an important question for you. What’s better than the warmth of the sun and the pitter patter sound of the rain on the windows? Well, dandelion, it’s something that happens when the sun is shining and the rain is pouring at the same time – why, Mrs. Rainbow of course! It’s raining today so, to make the sun put his hat on, we’re going to make a Rainbow Cake complete with all the colours of the rainbow. Then, maybe we’ll see a real one. If not, we can just eat one instead! Yum!
Golly, is that your tum rumbling away down there? We better get started…
What you’ll need to make Rainbow Cake:
125g butter softened, plus a little extra for greasing
225g plain flour
150g golden caster sugar
3 medium egg
1 tsp baking powder
pinch of salt
1 tsp vanilla extract
edible food colouring - red, orange, yellow, green, blue and purple
What you’ll need to make the icing:
1 tsp vanilla extract
3 x 250g tubs cream cheese or mascarpone
350g icing sugar
Right, let’s get going shall we?
Step 1
Ask an adult to heat your oven to 180C so that it’s nice and hot for when your cake is ready to go in. Grease two 20cm round sandwich tins and line the bases with baking parchment - this is so your cake doesn’t get stuck! Being careful not to spill anything, tip all the sponge ingredients, except from the food colouring, into a mixing bowl, and mix until smooth. If your arm starts to hurt then ask a grown up to lend a hand.
Step 2
Quick as a flash, weigh the mixture into another bowl to work out the total weight, then take half and put it back into the mixing bowl. Pick two of your favourite colours and stir a little into each mix. There you go, can you see them start to change colour? Keep going until the colour looks the best it can be!
Step 3
Put the different batters into the tins, trying to spread and smooth as much as possible – try not to waste a single drop of the batter – a rubber spatula will be just dandy. Bake on the same oven shelf for 12 mins until a yummy golden brown. Make sure to get a parent to help you when you handle anything hot though – ovens can be dangerous for little paws.
Step 3
Ask an adult to take the cakes out and pop them on a cooling rack. Wash the tins and bowls thoroughly, making sure not to leave any dirt and start again from step 1 – this time using your next two favourite colours. Repeat one last time to get six sponges, all of different colours, enough to feed the whole village! Leave them all to cool; you don’t want to burn anybody’s mouth or paws now, do you!
Step 4
To make the icing, mix the vanilla *mmmm* and cream cheese/mascarpone with an electric whisk together until smooth. Pop the icing sugar in and ask an adult to gently fold in with a spatula. Be careful – you don’t want it to get too runny because it might split! And that’s not what you want for your beautiful cake!
Step 5
Smear a little icing on your cake stand or plate – just a splodge to stick the first sponge cake. Start with the red (just like a real rainbow) and then spread with some icing right to the very edge. Repeat, sandwiching on top the orange, yellow, green, blue and finally purple sponges. Spread the remaining icing thickly all over the sides and top of the cake. Perfect, just perfect.
Do you know what will happen when you cut it open? That’s right… It’ll be a real cake rainbow! And look – the sun has just started to peek out, what a charm! We better clean up before we go outside to look for the pot of treasure at the end of the rainbow!
*munches on cake*
Mother Chocolate’s Recipes
02/01/16
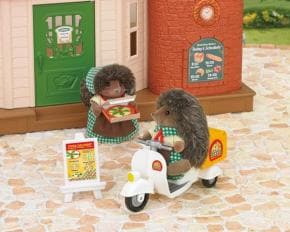
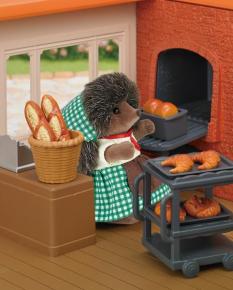
Ordering In
Gosh the Bakery’s opening soon and I don’t have everything I need! What’s a bakery without bread? Well it’s certainly not a bakery, let me tell you!
Righto, we had better order some tasty treats because I can hear your little tummy rumbling away and I don’t want hungry customers on our first day. Where shall we start?
ORDER FORM
- Bread: thick, thin, loafs and slices. Ah, I mustn’t forget baguettes! There’s nothing better than the smell of freshly baked bread in the morning
- Pastries: croissants, brioche and some delicious danishes
- Pies: pumpkin AND banoffee
- Cake: everybody loves cake. I might even get a custard tart or five
- Chocolates: we’d better get some in as we’re so close to Valentine’s Day!
- Tea: nothing says “wake up” like a cup of tea
I think that’ll do for now, there’s plenty to go around. Shall we make some bread while the order goes through?
What you’ll need to make bread
500g granary, strong wholewheat or white bread flour
7g dried yeast
1 tsp salt
2 tbsp olive oil
1 tbsp clear honey
STEP 1
Let’s start with the fun part… tip the flour, yeast and salt into a large bowl and mix it all together with your hands. Don’t worry, you can wash them when you’re finished. You might need to ask a grown up for help for this next bit - stir 300ml hand-hot water with the oil and honey, then stir into the dry ingredients to make a soft dough. That’s it, perfect!
STEP 2
Place the dough out onto a lightly floured surface and knead for 5 mins, until the dough no longer feels sticky, sprinkling with a little more flour if you need it. It’s really starting to take shape now!
STEP 3
Oil your loaf tin and put the dough in the tin, pressing it in evenly so that it’s nice and flat, just like a pancake. Pop it in a large plastic food bag and leave to rise for 1 hr, until the dough has risen to fill the tin and it no longer springs back when you press it with your finger. Does it spring back? Perfect, let’s carry on to the next step!
STEP 4
Ask an adult to heat the oven to 200C/fan 180C/gas 6. You’ll also need a grown-ups help to make several lines across the top of the loaf with a knife. Make sure they are very, very careful, we don’t want any accidents! Bake for 30-35 mins until the loaf is risen and golden, like the sun on a warm summer’s day. Tip it out onto a cooling rack and tap the base of the bread to check it is cooked. It should sound like a hollow log when it’s ready!
Mmmm doesn’t that look delicious? I can’t wait for the Brick Oven Bakery to open so that we can enjoy the smell of freshly baked bread every single day! Don’t forget to drop by for a cuppa.
The new Brick Oven Bakery will be available from February 2016 from major stockists and independent retailers.


 Change Region